First, some bad news. The sand table inserts, despite turning out great, got warped so they don't fit into the table. So I've had to go with a different solution for that. You'll see it later, and no it wasn't the Zuzzy mat.
Anyway, for those unfamiliar with miniature wargames, let me show you what you get.
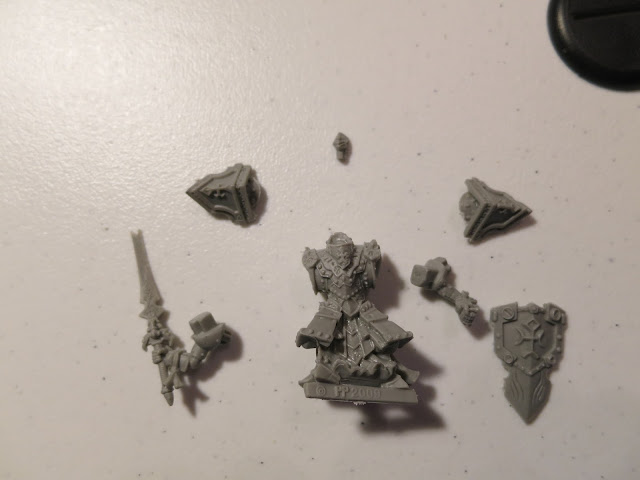
So, just so were clear, this are individually bagged minis (sometimes they come on sprues that you have to cut them out of), but they aren't put together. You have to do that yourself. Sometimes, it's a bit like getting something from Ikea without having instructions. Luckily, the Warmachine minis are pretty awesome and its evident what you have to do. That doesn't stop it from looking like this when you take them out of the bag though.
So, a little bit of super glue and a couple of hours end up producing the following:
Priming them is the next step in the process. You prime the minis so that paint will better stick to them when you go in to do detail work. You want to prime in colors that make sense for what the base colors of the mini will be.
The first army was Khador. Their colors are darker in nature, as seen by the mini here (not painted by me):
I primed black because of this. If I could have found a red primer, I would have used that, but black will work. It may mean I need to layer on more paint when painting, but that's OK.
To prime them, I put a little bit of tacky stuff on a piece of cardboard (obviously the black one there) and primed each individually. The goal is to do it enough to coat the entire mini, but not so much that it pools and ruins detail. So you want to keep the spray can at least a foot away while spraying too. You'll go through a bit this way, but they turn out good.
The next army was The Protectorate of Menoth. They are more of a white base. (again, not painted by me)
So I primed these guys white.
Yes, I did mess up the bases a bit moving them from the painting cardboard piece to the drying area. Live and learn! I have to do the bases with dirt and fake grass bits anyway, so I'll touch those up then. I'll give the primer a full 24 hours, then the actual painting will commence!


No comments:
Post a Comment